Flash Your First Board
This guide walks through writing an operating system image to an SD card with the graphical BeagleBoard Imaging Utility. It takes about five minutes plus download and write time.
-
Install the application. See Install BeagleBoard Imaging Utility (GUI).
-
Have a microSD card (8 GB or larger recommended) and a card reader.
-
Make sure the computer has internet access, unless you are flashing a local image file.
| Flashing erases everything on the selected card. Back up anything you want to keep. |
The sidebar on the left tracks your progress: Hardware → Software → Storage → Modify → Review → Write. You can go back to an earlier step at any time before writing starts.
1. Choose your board (Hardware)
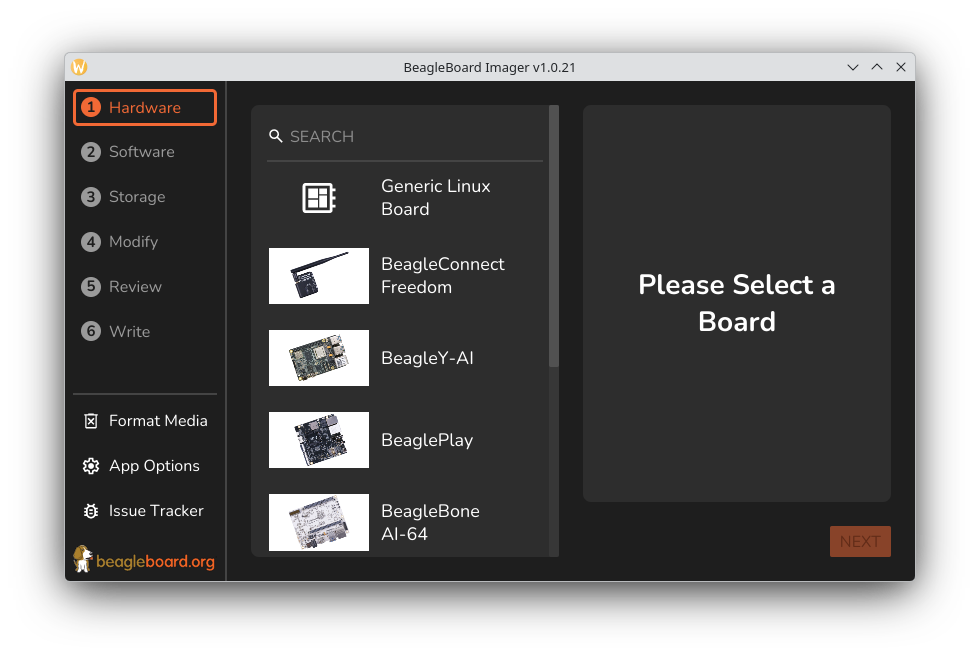
Select your board from the list. The panel on the right shows its specifications and links to its documentation. Click NEXT.
Not sure which boards are supported, or how each one is flashed? See Supported Hardware.
2. Choose an operating system (Software)
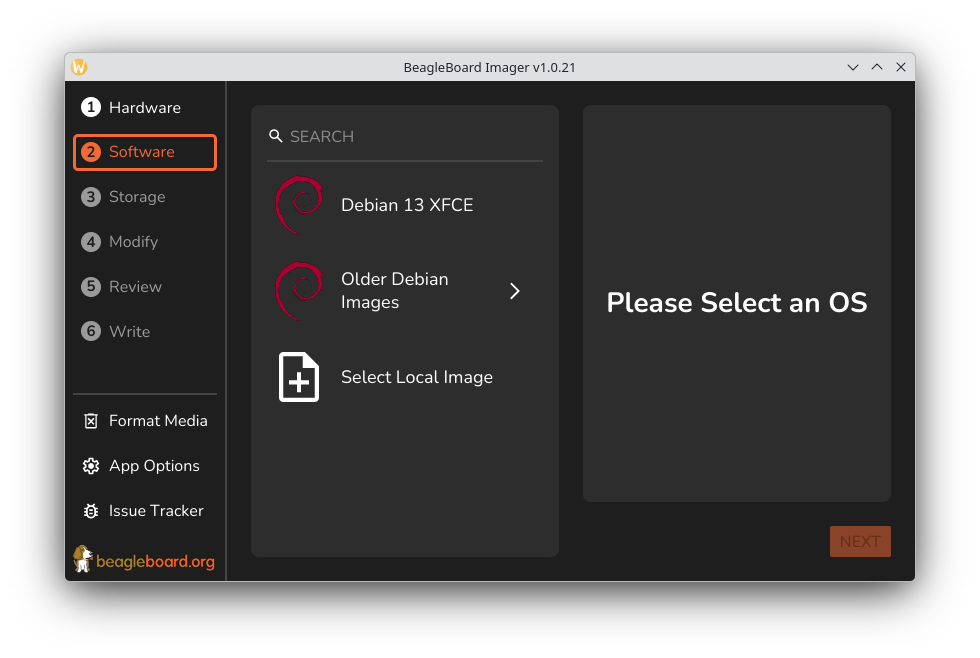
The list shows only the images recommended for the board you picked. Choose one, or pick the
local file entry to flash an image you have already downloaded (compressed .xz or raw .img).
For a local image, you can also pick an Init Format: the first-boot configuration format the image understands. Leave it at the default if you are unsure.
3. Choose the destination (Storage)
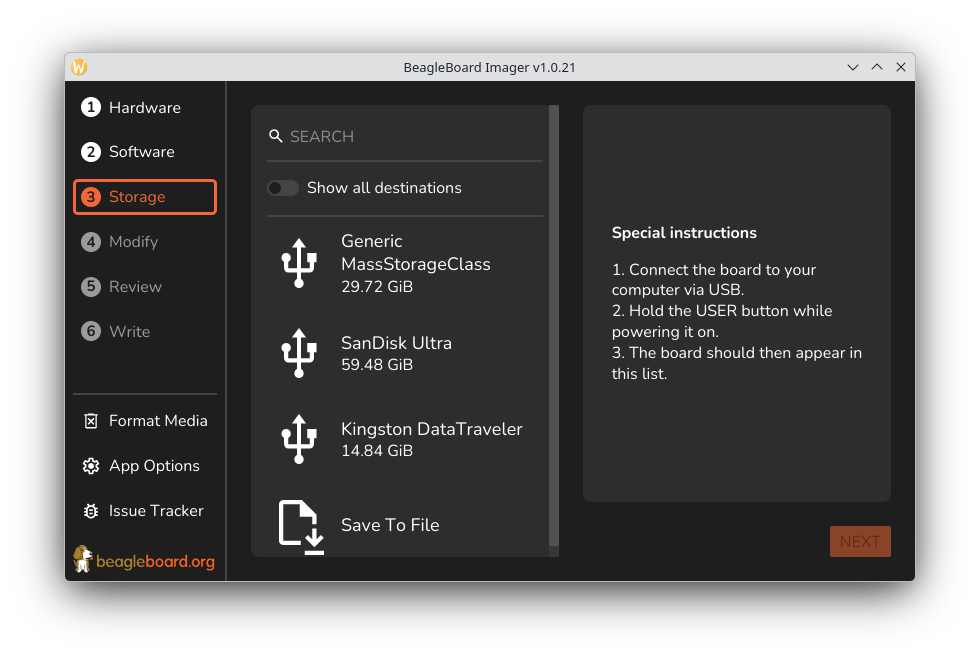
Insert the SD card and select it. Check the name and size so you don’t overwrite the wrong drive.
-
You can select more than one card to flash them all at once. The button then reads NEXT (n).
-
If your card does not appear, turn on Show all destinations. See also Drive not listed.
4. Customize the image (Modify)
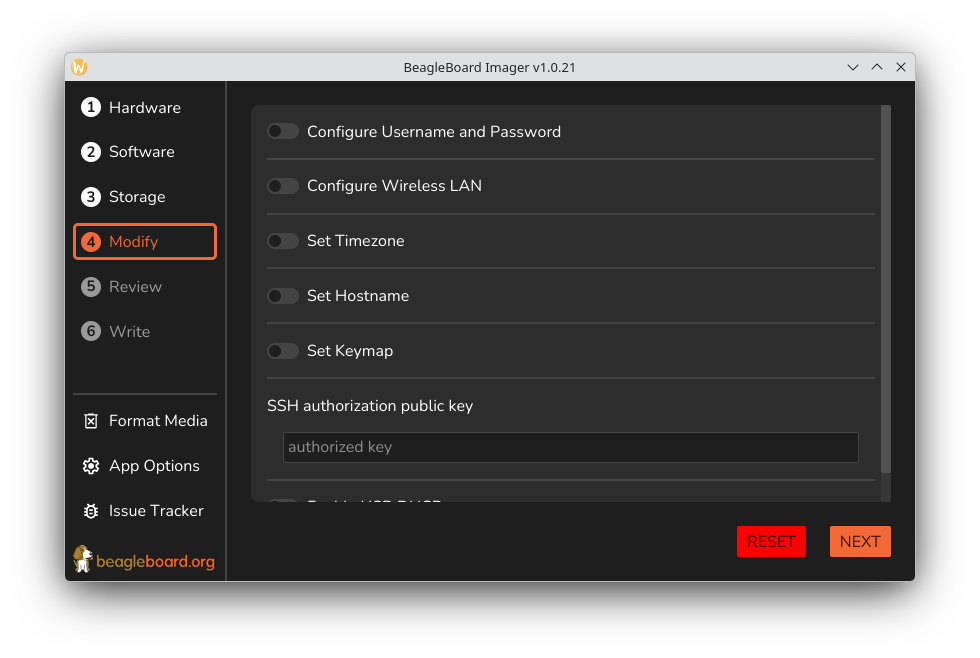
For supported images you can pre-configure the system so the board is ready on first boot, without a monitor or keyboard:
| Configure Username and Password |
Creates the default user. Required to log in to the desktop
session on recent images. The username cannot be |
| Configure Wireless LAN |
Wi-Fi network name (SSID) and password. |
| Set Timezone |
For example |
| Set Hostname |
The board’s network name, for example |
| Set Keymap |
Keyboard layout, for example |
| SSH authorization public key |
Paste your public key (for example |
| Enable USB DHCP |
Lets the board hand out an IP address over its USB network gadget, so you can reach it over the USB cable. |
RESET clears all customizations. Your choices are remembered for next time.
5. Review
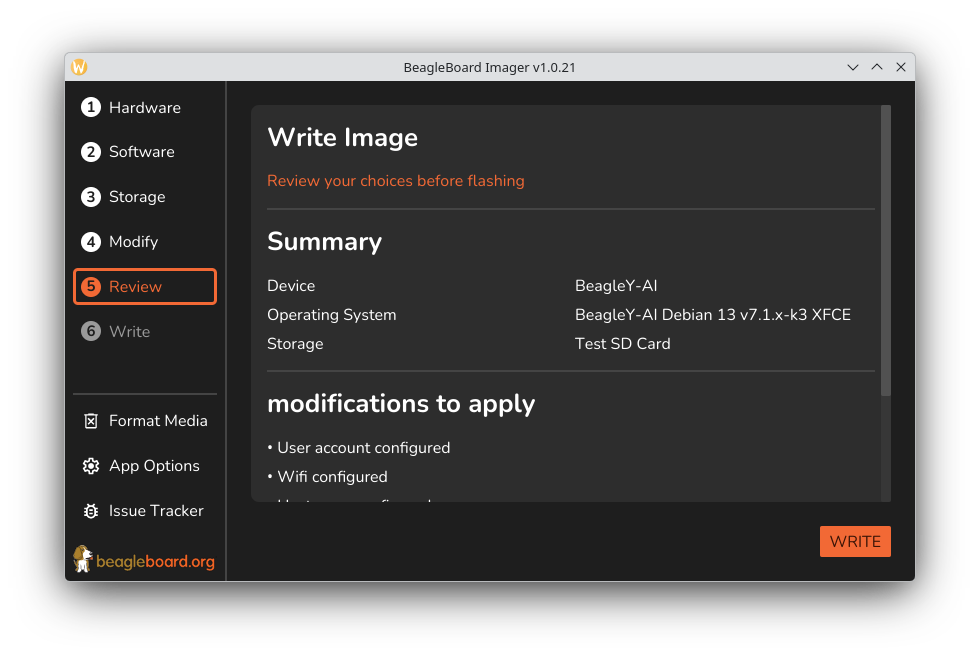
Check the summary of board, image, destination, and modifications. Start writing when everything looks right. Your operating system may ask for permission to write to the disk.
6. Write
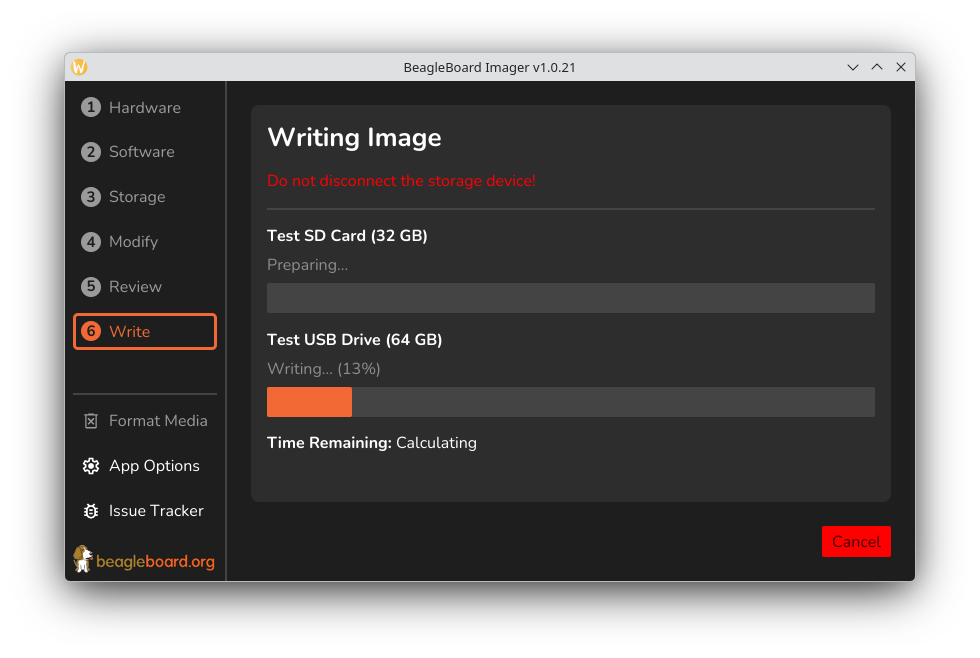
The image is downloaded (and cached for later) and written to the card. You can Cancel at any time, but a partly written card won’t boot until you flash or format it again.
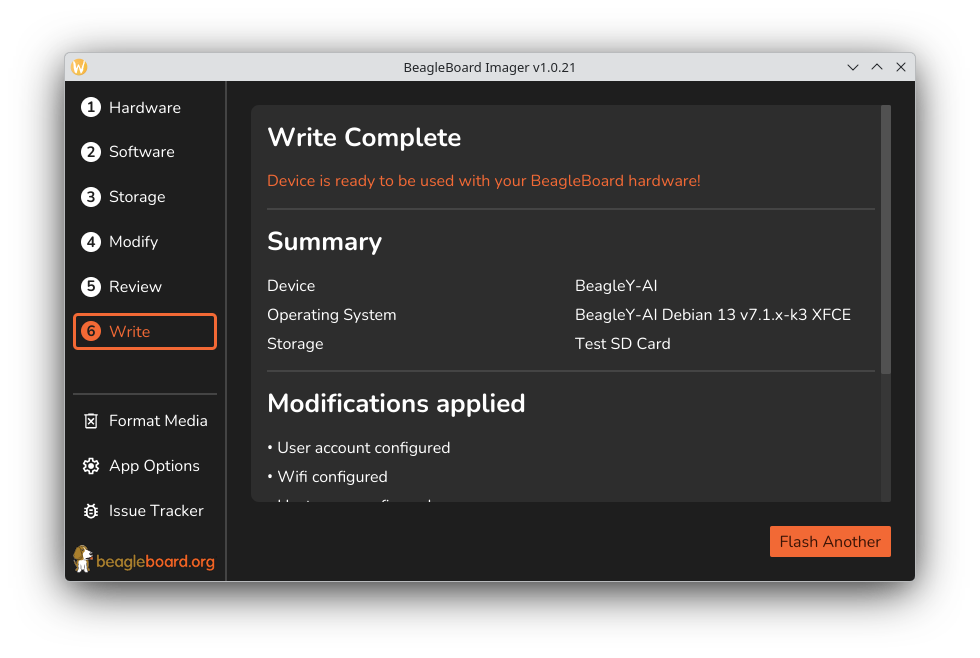
Write Complete lists the modifications that were applied. Click Flash Another to write another card.
If writing fails, the error screen shows the application logs. See Troubleshooting before reporting a bug.
7. Boot your board
-
Eject the SD card safely and insert it into the board.
-
Connect power (and Ethernet, a display, or USB, depending on your board).
-
Follow your board’s getting-started guide at docs.beagleboard.org.
If you set a username and Wi-Fi network, you can log in over the network once the board has
booted, for example ssh <username>@<hostname>.local.
Formatting an SD card
To restore a card to normal use, for example after using it with a board, pick Format Media in the sidebar. Select the card, review, and confirm. Formatting erases the card.
Flashing other targets
Boards such as BeagleConnect Freedom and BeagleConnect Zepto are flashed over a serial connection, not an SD card. The steps are the same, but on the Storage step you select the board’s serial port. On Linux this usually needs extra permissions. See Enable Serial Flashing Support.
Next steps
-
Prefer the terminal or need scripting? See Using the CLI.
-
Something went wrong? See Troubleshooting.